
Student Voices: Git Into it – An Overview of Git
Version control is at the core of every software project; to efficiently develop in a team, you must be able to work asynchronously and avoid stepping on each other’s toes. Additionally, there is the ever-looming threat of data loss, whether by accidental overwrite or hard drive failure. Git addresses all these problems by allowing you […]
Version control is at the core of every software project; to efficiently develop in a team, you must be able to work asynchronously and avoid stepping on each other’s toes. Additionally, there is the ever-looming threat of data loss, whether by accidental overwrite or hard drive failure. Git addresses all these problems by allowing you to easily push your work to a remote server, maintain different versions of the same project, and combine versions in a controlled fashion, making it an essential skill for any software developer.
Git is a flexible tool, but all version control strategies that use git manipulate two things: commits and branches. A git commit is a set of changes to a selected group of files that is tracked by git as part of a repository’s ‘history’ (side note: a git repository is simply a location in a file system that git tracks as a set of related files. Each project typically has its own repository). Commits do not record the entire state of a repository, only a particular set of changes. This means later commits are dependent on earlier ones to maintain a consistent and coherent history. Each repository starts with a single branch, often called ‘master,’ from which other branches are created. Branches are like parallel timelines of a repository. Each branch can have a unique set of commits. You could create a branch when adding a specific feature to a project, like adding authentication to a website for example. In general, new branches are created with the intent to ultimately combine your changes back into the master branch.
Let’s look at the commands you would use to create a repository with multiple branches and commits.
Git repositories are initialized with git init. This will create a hidden folder called .git which contains all git-related information for this repository.
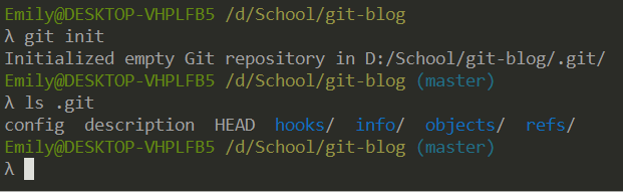
Generally, you don’t need to worry about editing the contents of this folder directly. As you can see, initializing a repository this way automatically creates a master branch.
Side note: I prefer to use a tool called Cmder when developing on Windows – all the screenshots are taken from it.
You will need to make an initial commit to give the master branch a history.
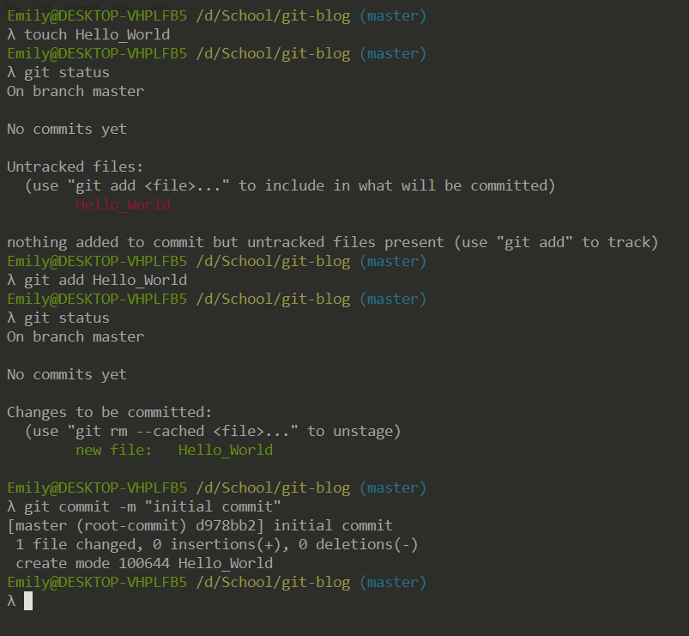
touch creates an empty file called ‘Hello_World’. git status lists tracked and untracked files (untracked files will not be included as changes in the commit). git add includes the empty file in our commit. Finally, git commit bundles our changes in with a message “initial commit.” Later, we will want to use more descriptive messages. Each commit is identified by a hash, and we can look through history using git log.

You might have noticed on the previous image that the commit number was only seven digits long. When referencing commits, you can use the first seven digits of the hash. I also identified myself as the author in a global git setting (which affects all repositories on my machine). You can do this per-repository as well. The setting in a local repository overrides the global setting.
The commands are:
git config –global user.name “Your Name”
git config –global user.email “you@email.com”
Remove the ‘–global’ option to set this for a single repository (but make sure you are inside a folder for that repository, otherwise it will not work as intended.)
Additionally, you can view the changes made between two points in history (two commits) using git diff.
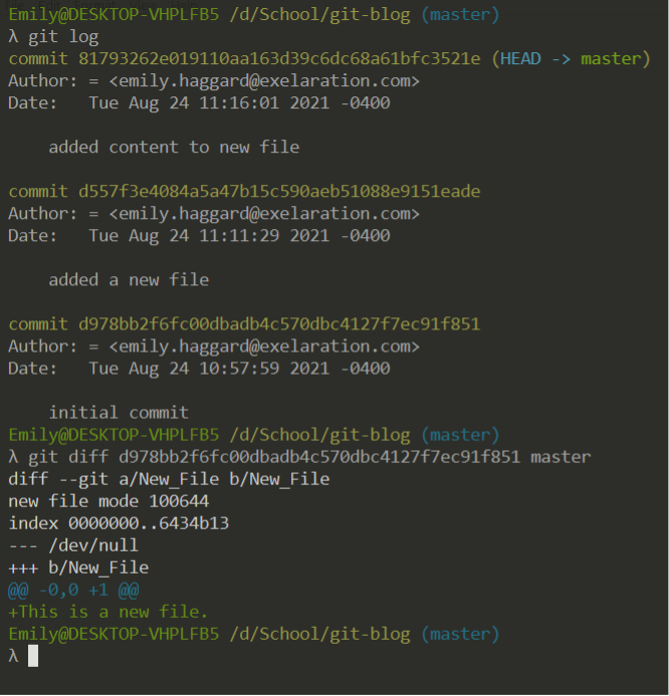
Here, you can see that between the latest commit (aliased as ‘master’) and the first commit, I added a file called ‘New File’ that contains the line ‘This is a new file.’ Note the order of the two commits in the command. If I were to reverse the order, git would show us what history looks like backwards (as if I had deleted the file). Remember: the latest commit goes last.
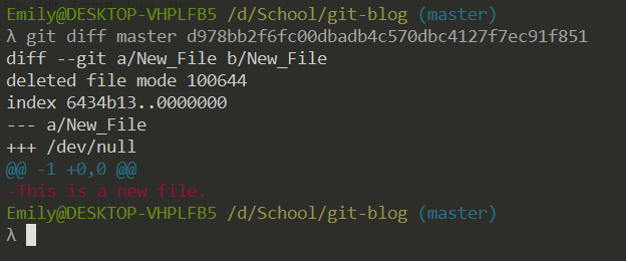
Here is the output of git diff when I put the latest commit first.
Now that some history has been established for the master branch, let’s make a new branch.
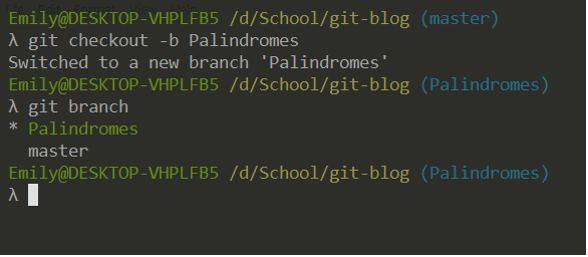
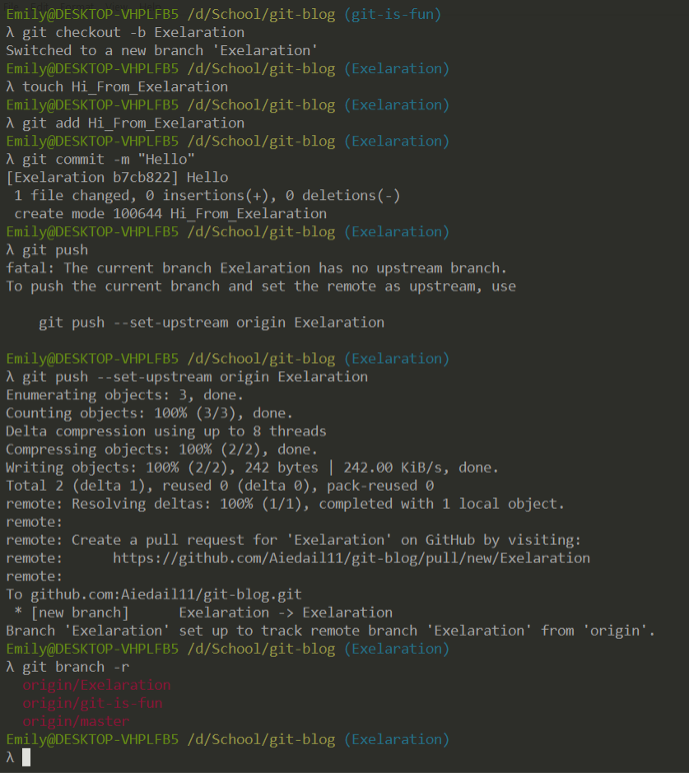
I use git checkout -b [name] to create a new branch, and I can check the existing branches with git branch (note that my current branch is indicated with an asterisk *).
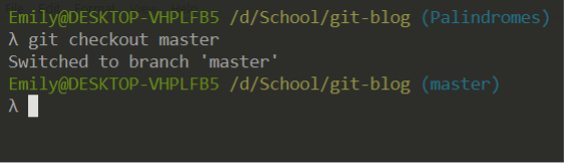
It’s important to be aware of what branch you are on when making changes. While it is possible to fix mistakes, it’s better to not make them. You can switch between branches using git checkout [name].
Side note: git checkout is a versatile command with many options. Simpler alternatives were introduced in Git 2.23, and one such alternative is called git switch. Instead of checking out a branch with git checkout [name], you can use git switch [name]. Instead of creating a new branch with git checkout -b [name], you can use git switch -c [name]. Another new command is git restore, but that will be covered in a later article.
If you happen to accidentally make changes on the wrong branch, and you have not made a commit yet, store them with git stash. All changes that you have made to your current branch since the last commit will be stored in the stash, which acts like a stack.
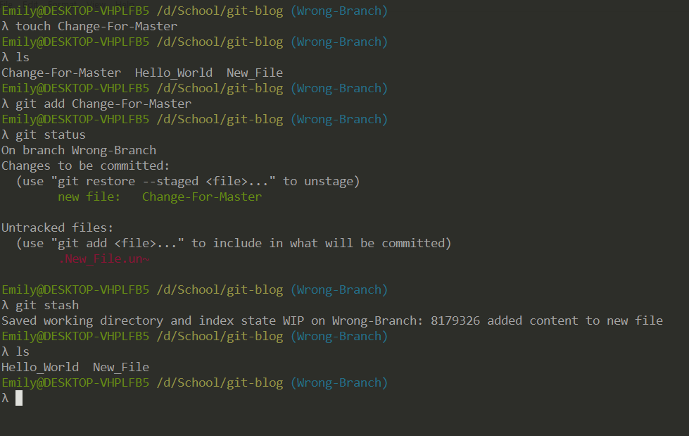
Note that you need to add the changes you want to save in the stash to tracking. Once they are stashed, your changes disappear. But don’t worry, they have been saved.
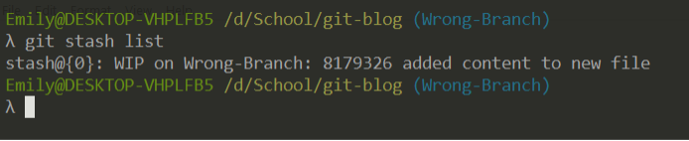
Use git stash list to view what’s on the stack.
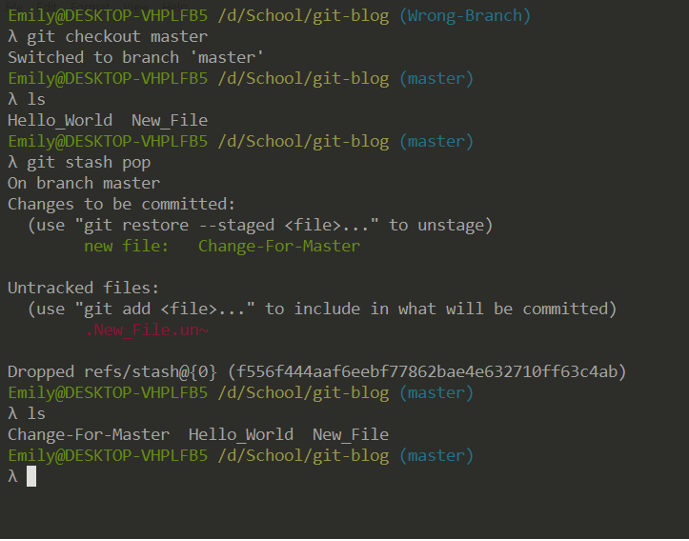
Switch back to the correct branch and use git stash pop to redo your changes (this will remove the entry from the stash.) You can also manually empty the stash with git stash clear.
Up until this point, all the repository data has been stored on your local machine. To share it with others or back up your work on a remote server, you’ll need to add a remote repository. Recall that I mentioned a repository is a location in the file system; your machine’s local repository and the remote repository are separate and not necessarily identical. If you completely break your project on your machine, but you have a stable version stored remotely, you can restore your local repository to that state with a few commands. If you suffer a hard drive failure, you can also restore the remote repository to a new location on your file system (a directory in a different hard drive, or a solid-state disk if you prefer).
There are many services that allow you to create remote repositories, I will be using Github. You can configure git to communicate with the remote repository over either SSH or HTTPS. If you use SSH, you will need to add a SSH key to your profile. For the purposes of this article, I will assume you have already done that.
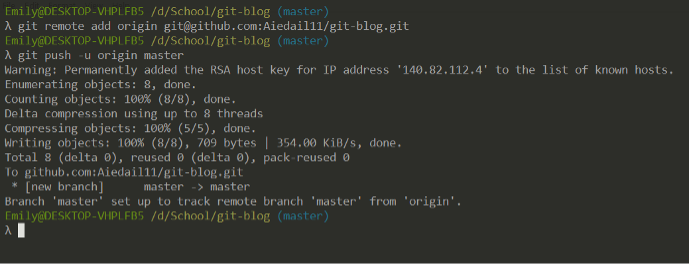
Here I tell git about the remote repository, then git push my changes on the master branch to it. Note that you can have branches on one repository that do not exist on the other.
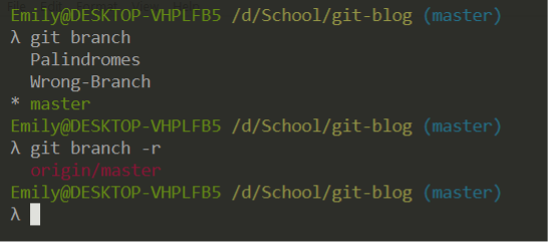
Here you can see there are three branches on the local repository, and one on the remote repository.
Note: This screenshot was taken later, so an additional commit is visible.
Additionally, the state of our local master branch (‘master’) and the remote master branch (‘origin/master’) are tracked separately. However, they happen to be at the same point in history (on the same commit).
Let’s assume you have a teammate that does some work on a different branch and pushes it to the remote repository. Their work will not automatically appear in your local repository, you need to synchronize your local repository and the remote repository.

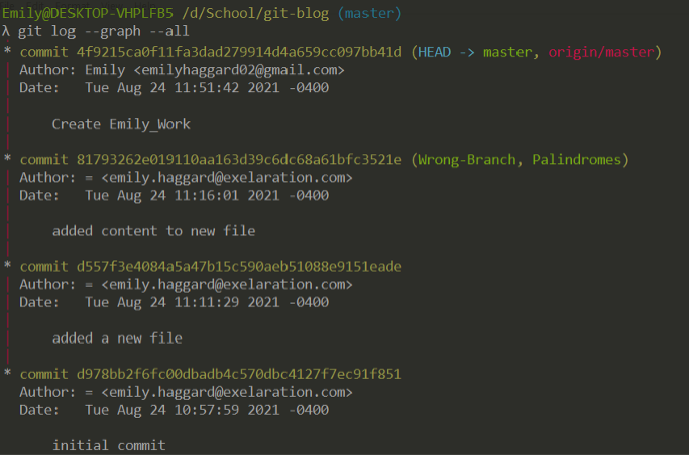
We use git fetch to update our local repository’s information on the status of the remote branches. Note how our local master branch is on the same commit as before, but ‘origin/master’ is gone. There is still one more step to make them the same.
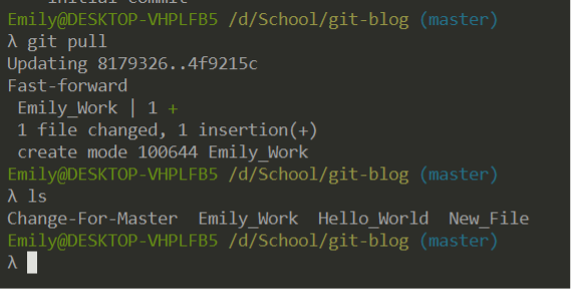
While on the branch we want to update (use git checkout if needed), we use git pull.
If you have made changes to the local branch before fetching, or if for any other reason the history of your local master branch and the remote master branch are in conflict, you will encounter a merge conflict. I will address this topic when we discuss merging and rebasing in a later article. A good rule of thumb is to fetch/pull before starting any work.
Also, if your teammate were to create a new branch, fetching would inform you and you could checkout the new branch to see their work.
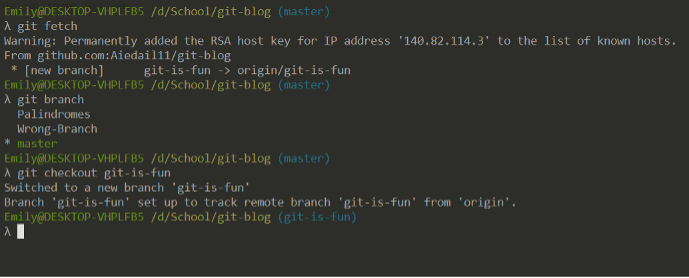
Local and remote branches must be manually connected, but git is helpful and will remind you to do so.
You have now learned about commits, branches, and git history. In a future article, I will discuss merging, rebasing, and branching schemes.
Go forth and git!
Emily Haggard is a senior studying computer science at Virginia Tech with a wide variety of experience in technology, from web development to kernel programming, and even network engineering and cybersecurity. She is an active member of her community, having founded a cybersecurity club for middle schoolers. In her free time, she enjoys playing Dungeons and Dragons and writing novels.